Introduction
Install4j has a flexible model for styling the UI of installer applications that allows you to arrange content and styling elements in arbitrary ways. While there is an API to do this programatically, you can configure form styles in the install4j IDE without any custom code. Form styles use the same foundation as form components for screens. All default styles are created with form styles, so the details of the default styles can we tweaked very easily and new styles can be developed by starting with the default styles.
Configuring styles
Styles are configured on a per-project basis. On the "Installer->Styles" step of the install4j IDE, all available styles are listed. When you add a style, it can either be a configurable form style, or a style implementation from your custom code. Styles are either standalone or not. A non-standalone style cannot be used directly, but is only available for nesting into other styles. One single style is marked as the default style and is shown with a bold font. With the "Set As Default" action you can change the default style. Styles can be grouped into folders for organizing them according to your individual preferences. For example, in the default styles, the nested styles are grouped into a separate folder whereas the standalone styles are located at the top level.
On the "Installer->Screens & actions" step of the install4j IDE, you can apply styles. Installer applications, screen groups and screens all have a "Style" property. For installer applications, this is property is set to "Default". You can change it to any standalone style. For screen groups and screens, the "Style" property is set to "Inherit from parent". The property also indicates which style is actually inherited. Alternatively, you can choose to explicitly set a style for the selected element. Any screen groups and screens below it will now inherit this style.
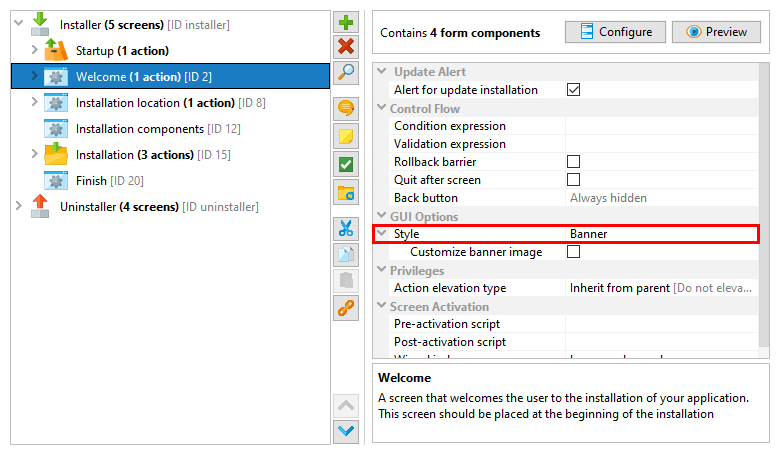
Some screens have a preference for a particular style. For example, the "Welcome" and "Finish" screens want their style set to "Banner". When adding such a screen, the IDE matches the style by name. In this example, if no style named "Banner" is available, the default style is used. Otherwise, install4j keeps track of style associations by ID and you can rename styles without breaking any associations.
If you delete a style, all its style associations are broken. Compiling the installer will now fail and you will have to visit all installer applications, screen groups and screens where this style was explicitly selected and choose a new style.
Should you want to return to the default styles, there is a "Reset Styles To Default" action for that purpose. Existing style associations are matched by name in that case, so style associations with the "Banner" style survive this reset, for example.
Form styles
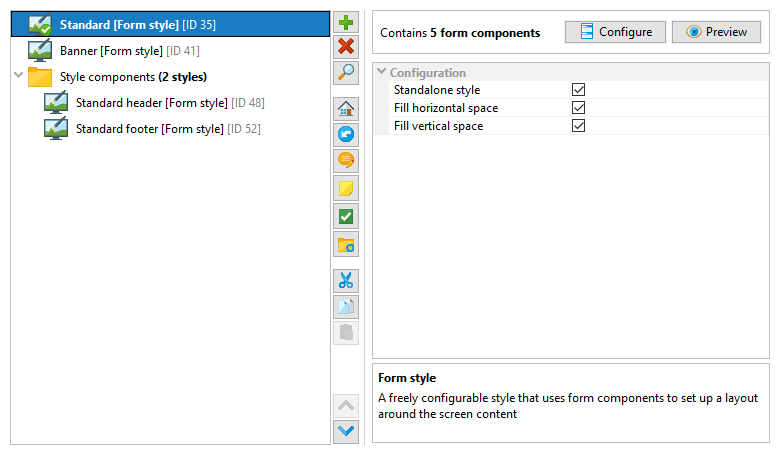
A restricted set of the form components that are available for building form screens can be used to build form styles. Form components that take user input are not suitable for styles because styles have a different life-cycle than screens.
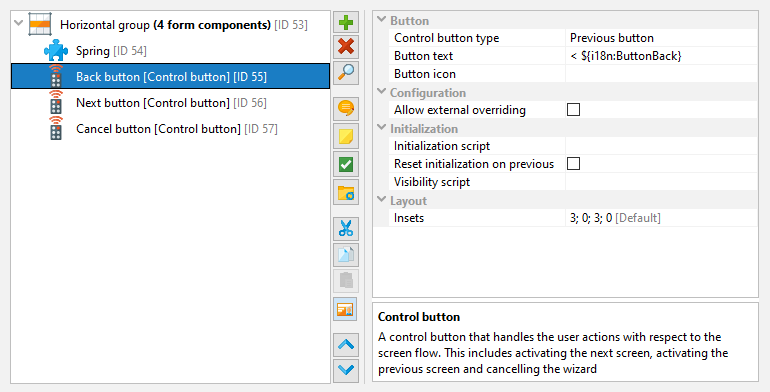
In addition, form styles can use a set of special form components. The "Screen content" form component contains the UI component of the screen and is changed each time when a screen is activated. When you preview the style, this content area is shown with a placeholder. The "Screen Title" form component shows the title or the subtitle of the screen, depending on its "Title type" property. The "Control button" form component is used for realizing the "Next", "Previous" and "Cancel" buttons.
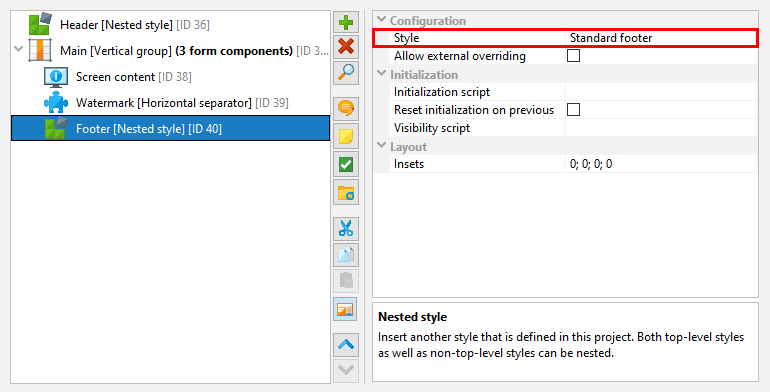
Finally, the "Nested style" form component allows you to embed another style. In this way you can build a set of styles that share common parts. For example, in the default styles, the navigation buttons at the bottom are the same. With the "Standard Footer" style that is used by both the "Standard" and the "Banner" standalone styles, you have a single place to change its settings.
Graphical styling elements
A key concern of styling is the placement of images, either in the foreground or in the background. Both kinds of placements are handled by layout groups in form styles. For both vertical and horizontal form groups, setting their "Image file" property shows additional properties that allow you to place the image in the layout group. If you place the image in the foreground, it cuts off an entire edge of the rectangle that can get its own background and border. In that way, the image can blend seamlessly into its surroundings.
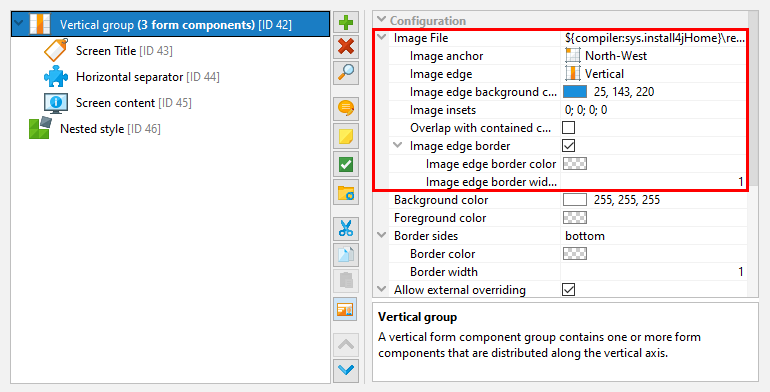
To place an image into the flow of form components, you can use the "Image insets" property and set its "Icon" property.
Other important styling elements are borders and separators. Again, this is handled by layout groups. With their "Border sides" property you can define which sides of the border should be drawn. Color and thickness of borders are also configurable.
By default, layout groups and form components are transparent, so that the default background color of the window shines through. By setting the "Background color" property of a layout group, you can make it opaque and give it a specific color. The "Foreground color" property sets the font color for contained form components that do not have their color set explicitly.
Overriding properties
Some styles can have elements that are specific to particular screens or particular installer applications. For example, the header image in the "Standard" style or the banner image of the "Banner" style could be required to change for each screen. Instead of duplicating styles in this scenario, install4j allows you to designate certain properties of selected form components and layout groups that should be overridable when the style is applied.
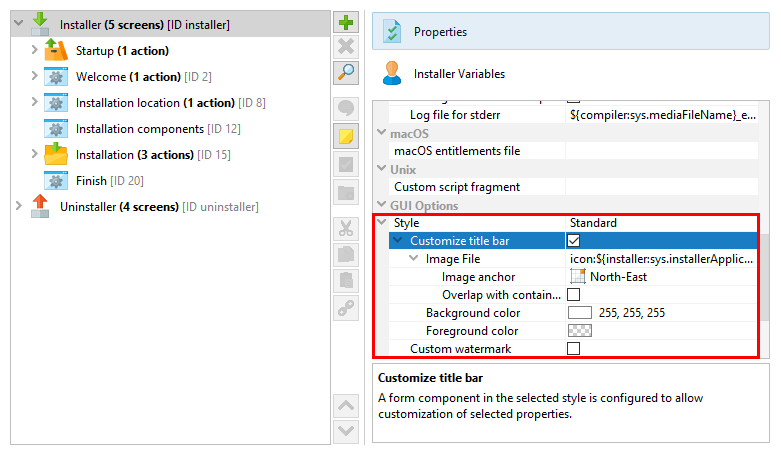
When editing the form components of a form style, each form component has an "Allow external overriding" property. If you select that property, a named overriding entry will be offered when you explicitly apply the style on the "Installer->Screens & actions" step. With the "Override title" property, you specify the displayed name for the override entry and that name is used for saving the overridden properties. This means that the name must be unique for a single style and that overrides are lost if you change the name. The "Property selection mode" property then lets you select which properties should be overridable, either all properties are overridable, or a list of properties is included or excluded.
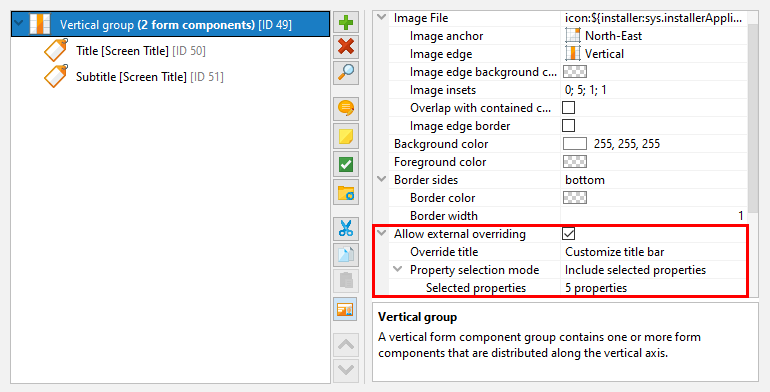
When you select a style on the "Installer->Screens & actions" step, install4j scans the style and all its nested styles for form components and layout groups with defined overrides. Each named override is presented as a check box property. If you select the check box, the overridable properties of the form component or layout group are copied and displayed as child properties. You can now change the properties to different values. Note that the overridable properties lose their connection to the default values in the original form component or layout group. If you change a default property value, you have to manually change it in all overrides, if necessary.
For more complex overriding cases, consider adding a "Nested style" form component and making its "Style" property overridable. When applying such a style, you can substitute a different nested style as appropriate.
API
Under some circumstances, styles are more easily implemented with the API. For example, if you want to have configurable properties that determine the construction of the style or if the styling cannot be realized with the facilities of the form style.
The sample project "customCode" includes a style class SunnySkyBackgroundStyle and
its associated BeanInfo SunnySkyBackgroundStyleBeanInfo that show such an example style.
It paints a background image that depends on the window dimensions and continues up to the window border.
In the "customCode" project, look for the "Configurable form" screen in in the installer and preview the
form in order to see what it looks like.
That example also shows how to implement a style that wraps a user-selectable style. The main style is still
the standard style and the "Sunny sky background" style takes the function of a decorator. To make development
of such wrappers easier, the API includes a convenience class com.install4j.api.styles.WrapperStyle.
Merging styles from other projects
Instead of duplicating styles across projects, you can develop them in one project and merge them into other projects. The merge projects functionality in install4j includes an option to merge styles.
If styles are merged, the "Style" property of installer applications, screen groups and screens shows the merged styles as well, with their names prefixed with the project name that was assigned in the merge settings.
If you link to screens or screen groups of merged projects, they will use their configured styles from the merged project only if style merging is enabled. Otherwise, install4j tries to match a style by name in the main project.
Overriding standard icons
If you would like to change the standard icons in the installer, have a look at the JAR file
resource/i4jruntime.jar in the install4j installation directory. The package
com.install4j.runtime.installer.frontend.iconscontains all icons that are used by the installer.
To replace some or all of these icons with your own version, create a JAR file that contains just the new icon
files in the same directory and add it on the "Installer->Custom Code & Resources" step. The installer will
first try to load an icon from the custom code. Failing that, it will fall back to the built-in version.